Picture this: You’re cruising down the road, enjoying the rhythm of the engine and the wind in your hair when suddenly, your car comes to a screeching halt. As you step out to investigate, you notice it – a flat tire. We’ve all been there at some point, feeling slightly defeated and unsure of what to do next. But fear not, because mastering the art of tire change is easier than you might think. In this article, we’ll guide you through the process of transforming a flat tire situation into a feeling of readiness, ensuring you’re back on the road in no time. So, let’s dive in and equip ourselves with the knowledge and confidence needed to tackle the unexpected challenge of a flat tire. But before we embark on this tire-changing journey, let’s take a moment to introduce ourselves to the world of Rick’s Emergency Roadside Assistance. We’re your trusted partner for 24/7 towing and roadside services in Chicago, and we’re here to lend a helping hand whenever you find yourself in need. So, let’s journey together as we navigate the ins and outs of flat tire changes and discover the secrets to getting back on the road swiftly and safely.
Mastering Car Jump Starts
A dead car battery can be a frustrating experience, especially when you’re in a hurry to get somewhere. However, with a little know-how and preparation, you can master the art of car jump starts. By following these simple steps, you’ll be able to get your vehicle back up and running in no time.
Firstly, it’s essential to have the necessary tools on hand for a successful jump start. You will need a set of jumper cables and a functioning vehicle with a fully charged battery. It’s always a good idea to keep these items in your trunk for emergencies.
To begin, park the functioning vehicle close enough to your car so that the jumper cables can reach both battery terminals. Make sure both vehicles are in park or neutral and turned off before proceeding.
Next, identify the positive and negative terminals on both batteries. The positive terminal is usually marked with a plus sign (+) or the letters "POS," while the negative terminal is marked with a minus sign (-) or the letters "NEG." It’s crucial to connect the cables correctly to avoid any potential damage.
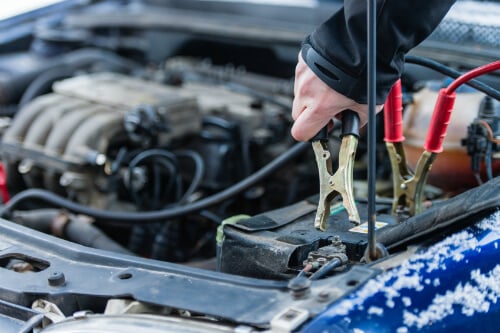
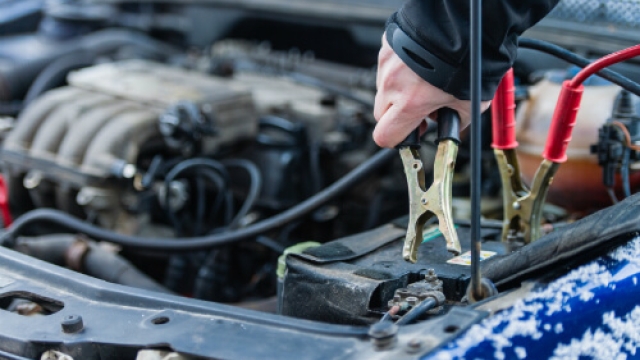
With the cables ready, attach one end of the red (positive) cable to the positive terminal of the dead battery, then attach the other end to the positive terminal of the functioning battery. Similarly, connect one end of the black (negative) cable to the negative terminal of the functioning battery and the other end to a metal surface on the dead vehicle, such as an unpainted bolt or bracket. This will help prevent any sparks near the battery.
Once all the cables are securely attached, start the functioning vehicle and let it run for a few minutes to allow the dead battery to charge. Afterward, try starting the vehicle with the dead battery. If it starts successfully, you can disconnect the jumper cables in the reverse order they were attached, being careful not to let the clamps touch each other or any metal surfaces.
With these steps, you’ve now mastered the art of car jump starts. Remember, it’s always a good idea to have a reliable set of jumper cables and a functioning vehicle nearby for emergencies. Don’t let a dead battery disrupt your plans when you can easily get back on the road with a successful jump start.
Unlocking Car Lockouts
Auto Lockout Assistance
Getting locked out of your car can be a frustrating experience, but with the right knowledge and tools, you can quickly regain access to your vehicle. Whether you accidentally left your keys inside the car or lost them altogether, here are some tips to help you unlock your car and get back on the road.
Check for Spare Keys: Before you attempt any lockout solutions, it’s worth checking if you have a spare key. Spare keys can save you a lot of time and hassle, especially if you have one hidden in a secure place outside of your car. Remember to always keep a spare key in a safe location, such as with a trusted friend or family member.
Use a Coat Hanger or Slim Jim: If you don’t have access to your spare key, you can attempt to unlock the car using a coat hanger or a slim jim. Straighten the coat hanger or insert the slim jim between the door frame and the window. Gently manipulate the tool until you locate the lock mechanism. Once you find it, carefully push or pull it to unlock the door.
Call a Professional: If all else fails or you’re uncomfortable attempting to unlock your car yourself, it’s best to call a professional locksmith or roadside assistance service like Rick’s Emergency Roadside Assistance. These experts have the experience and tools needed to safely unlock your car without causing any damage. They can quickly come to your location and get you back into your vehicle in no time.
Remember, getting locked out of your car can happen to anyone, so it’s important to stay calm and be prepared. By following these tips or relying on professional assistance, you’ll be able to resolve the car lockout situation swiftly and get back to your day without any further interruptions.
Efficient Flat Tire Changes
Changing a flat tire can be a stressful situation, but with the right knowledge and tools, you can efficiently get back on the road in no time. Here are a few tips to help you master the art of flat tire changes.
Firstly, it is essential to find a safe location to perform the tire change. Pull over to the side of the road and make sure you are away from oncoming traffic. Engage your hazard lights to alert other drivers of your presence. Safety should always be your top priority.
Once you have found a safe location, gather all the necessary tools and equipment for the task. These typically include a spare tire, jack, lug wrench, and a vehicle owner’s manual. Familiarize yourself with the location of the spare tire and the appropriate jack points for your particular vehicle.
Next, you’ll need to remove the flat tire. Loosen the lug nuts with the lug wrench before raising the vehicle with the jack. Once the vehicle is lifted off the ground, completely remove the lug nuts and carefully take off the flat tire. Be sure to place the lug nuts in a secure spot, so they don’t get lost.
Now it’s time to install the spare tire. Align the holes on the spare tire with the bolts on the wheel hub and carefully slide it onto the hub. Once in place, hand-tighten the lug nuts as much as possible. Lower the vehicle using the jack and then use the lug wrench to fully tighten the lug nuts.
Remember to double-check that all the lug nuts are securely fastened before hitting the road. Once you have completed the tire change, make a mental note to replace the spare tire with a new one as soon as possible, as spare tires are typically not designed for long-term use.
Efficient flat tire changes are possible with the right preparation and knowledge. By following these steps, you can confidently handle a flat tire situation without stress or worry. With practice, you’ll become a pro at tire changes, ensuring a smoother journey on the road ahead.